Course: RISC-V processor Hello World! in VHDL
$59
Create a reduced instruction set computer using the RISC-V processor architecture. Learn how a CPU works by implementing one in VHDL and running it on the FPGA.
Description
This course teaches how to create a RISC-V reduced instruction set computer in VHDL and write a C program to run on it. After compiling the C code using GCC, we will run the program on our custom CPU and see the “Hello World!” output on the screen.
We implement the ALU ( arithmetic logic unit), the decoder, the program memory, and just enough instructions in the control unit to run the Hello World program on our processor.
See the video below for a preview of selected lessons.
This course is also available in the VHDLwhiz Membership.
The difference is that when you purchase this product, you get permanent access to the course, while the membership charges a monthly fee to access the content.
Hardware used in the course
- Arty S7-50: Xilinx Spartan-7 FPGA (SKU: 410-352)
Resellers: Digilent, Farnell, Newark, Mouser, Digi-Key
(You can use almost any board as long as it has a UART interface.)
Software used in the course
I am using Windows 11 in the course. All the other software is available for free for Windows and Linux:
- Questa – Intel FPGA Edition(includes Starter Edition)
(Any version of ModelSim or QuestaSim will work) - Xilinx Vivado
(Or the implementation software for your FPGA architecture) - Microsoft Visual Studio Code
(Any editor will do) - YAT – Yet Another Terminal
(Any serial (UART) terminal program will do)
Course outline
The overview below shows the lessons in this course.

1 - Introduction
Welcome to this exciting course about creating a RISC-V CPU that will run your Hello World C program.

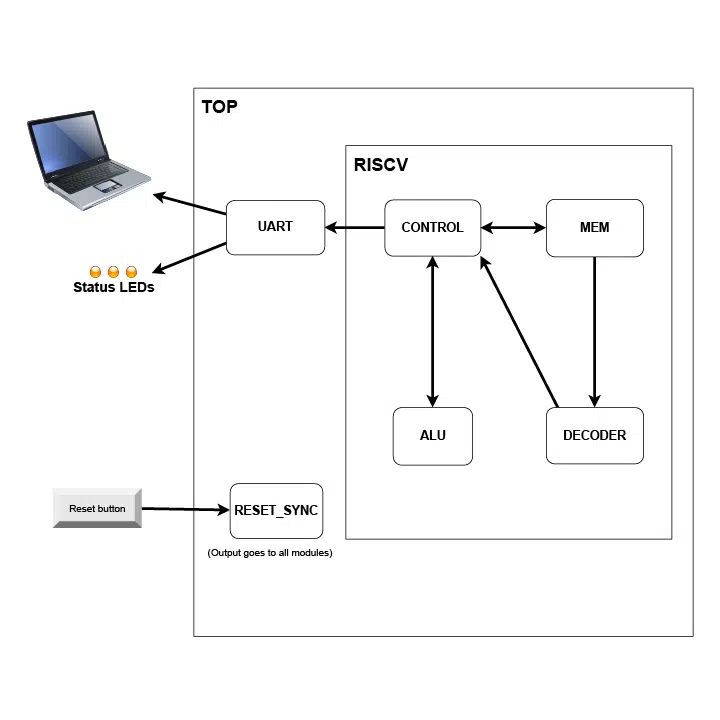
2 - Top-level diagram
This flow chart shows the VHDL modules we will create and the data flow in the design.

3 - Top-level module and testbench
I have prepared a VHDL project with everything except the RISC-V CPU to help you get started.

4 - Compiling the C program using GCC
To get the instructions for loading into memory, we must compile the C code as a bare-metal program and disassemble it.

5 - Loading the program into block RAM
Let's create the memory module and load the instruction words and data from the hex file.

6 - Slicing the instruction word
We must extract the opcode, function fields, source and destination registers, and the immediates from the instruction word.

7 - Decoder
The RISC-V RV32I instruction set listing has all the information needed to determine which operation it is.

8 - Arithmetic logic unit (ALU)
The (ALU) performs basic arithmetic and logical operations, such as addition, subtraction, and bit shifting.

9 - Defining the control unit module
The control unit is the CPU component that manages and coordinates all the processor operations by executing instructions.

10 - Control unit finite-state machine
We will use an FSM with nested case statements to fetch and execute instructions.

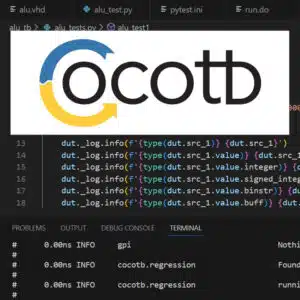
11 - Debug printouts in RTL code
You can include debugging code like report statements and asserts in production code.

12 - ADDI (add Immediate)
This instruction adds an immediate to a register value and stores the result in a register.

13 - LUI (load upper immediate)
LUI loads the top 20 bits of the destination register with a value from the U-immediate.

14 - SB (store byte)
Write a byte anywhere in the memory—or to the memory-mapped UART interface, in our case

15 - LBU (load byte unsigned)
We must slice the correct eight bits from the memory output to load only one byte.

16 - BEQ & BNE (branch if equal/not equal)
These instructions compare two registers and conditionally jump by changing the program counter.

17 - JAL and JALR (jump and link (register))
These unconditional jumps will update the program counter and save the return address in a register.

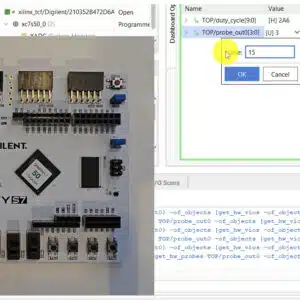
18 - Implementing the design on the FPGA
We'll implement the top-level design on the Digilent Arty S7-50 board with a Xilinx Spartan-7 FPGA using Vivado.

19 - Hello World!
Let's test on the FPGA to see our C program running our custom RISC-V CPU.
This course is also available in the VHDLwhiz Membership.
The difference is that when you purchase this product, you get permanent access to the course, while the membership charges a monthly fee to access the content.

Reviews
There are no reviews yet.