Course: Snake game on FPGA: Real-time VHDL simulation with GUI
Implement the classic Snake game on an FPGA with a 128×32 OLED display. Create a custom GUI to play the game in real-time using the Questa VHDL simulator.
Description
This course teaches how to implement the classic Snake game on an FPGA with a 128×32 OLED display. You will learn to set up a system from VHDL modules and projects already available in the VHDLwhiz library.
Furthermore, you will create VHDL simulations that interact with other systems in real-time, such as C or Python programs. We will do both by using Questa/ModelSim’s Foreign Language Interface (FLI) API.
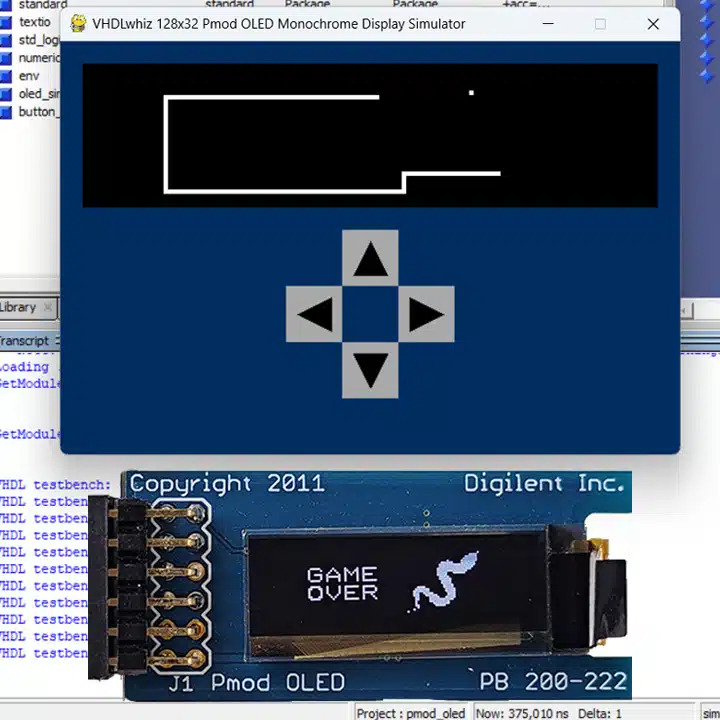
See how to set up a VHDL testbench in Questa to actually play the game on a GUI in the simulator. It will be a custom graphical user interface (GUI) complete with buttons and a display that looks like the real thing.
This course is only available in the VHDLwhiz Membership.
The membership subscription gives you access to this and many other courses and VHDL resources.
You pay monthly to access the membership and can cancel the automatic renewal anytime. There is no lock-in period or hidden fees.
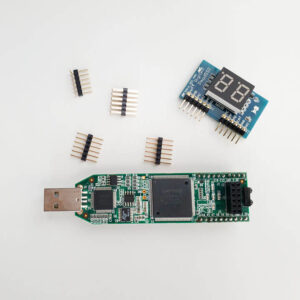
Hardware used in the course
- Pmod OLED: 128 x 32 Pixel Monochromatic OLED Display (SKU: 410-222)
Resellers: Digilent, Farnell, Newark, DigiKey, Mouser, RS Electronics - Arty S7-50: Xilinx Spartan-7 FPGA (SKU: 410-352)
Resellers: Digilent, Farnell, Newark, Mouser, DigiKey
(You can use almost any FPGA board.)
Software used in the course
I am using Windows 11 in the course. All the other software is available for free for Windows and Linux:
- Questa – Intel FPGA Edition(includes Starter Edition)
(Any version of ModelSim or QuestaSim will work) - Xilinx Vivado
(Or the implementation software for your FPGA architecture) - Microsoft Visual Studio Code
(Any editor will do)
You don’t need any hardware to do the course because I’ll give you a hardware simulator GUI in a later lesson. It should work on Windows and Linux. There’s one downloadable for each platform in the course.
Course outline
The overview below shows the lessons in this course.

1 - Introduction
Join me in implementing "Hardware Snake" on this FPGA board! Let me tell you what lies ahead in this course.

2 - Project starting point
We'll base the new project on an existing VHDLwhiz implementation of a Pmod OLED display controller. Download the files to get started!

3 - Creating the Vivado project
See how to set up the Vivado project from scratch for the Arty S7-50 or any Digilent/Xilinx/AMD board.

4 - Bit write enable in block RAM
We must manipulate single bits in the byte-addressable frame buffer to update individual pixels on the display. Here's how to do it without affecting the other bits.

5 - Pixel writer module
Let's create a module that can change individual pixels on the display using row and column addresses. It will make it easier to implement the Snake gameplay.

6 - Simulation graphical user interface (GUI)
Using Questa/ModelSim's Foreign Language Interface (FLI) API, a C program, and a Python script, we can create a GUI to play the Snake game on while simulating our VHDL design.

7 - Timer tick module
This module produces a pulse at a given interval, allowing us to control the speed of the gameplay in real time. We need it to limit the frame rate of the game.

8 - Button reader module
This module will read pushbuttons on the FPGA board, synchronize them to avoid metastability, and output the latest clicked key: Left, Up, Right, or Down.

9 - Game controller module and testbench
Finally, it's time to start on the Snake game control logic. Let's create the module entity and testbench using the simulation GUI to interact with the game in real time.

10 - Snake movement
In this lesson, we connect the GUI buttons to the game controller to move the snake head on the display in the Questa simulation. We'll use a finite-state machine (FSM) to achieve that.

11 - Snake tail tracking
We'll use a ring buffer implemented in block RAM as a FIFO to store the snake's path so that we can erase the tail pixels when it grows.

12 - Snake eats its tail
If the snake eats its own tail, it's game over. To implement that, we must store all tail coordinates in block RAM and check if the new head location is part of the body.

13 - Snake food and FPGA randomness
The point of the Snake game is to eat the food/fruit/dots that appear on the screen, which causes the snake to grow in length. Let's create logic to place it in pseudo-random locations.

14 - Game over
Now, it's time to move from the simulator to the FPGA board and play the Snake game on real hardware. Let's also show some nice graphics on Game Over.

15 - BRAM reset
After clearing all block RAM content, we finally have the game working, also after a reset. Now, it's gaming time!
This course is only available in the VHDLwhiz Membership.
The membership subscription gives you access to this and many other courses and VHDL resources.
You pay monthly to access the membership and can cancel the automatic renewal anytime. There is no lock-in period or hidden fees.
Reviews
There are no reviews yet.