Course: UVVM introduction
The Universal VHDL Verification Methodology (UVVM) framework provides a utility library, reusable verification components, and a way to structure your VHDL testbenches.
Description
The Universal VHDL Verification Methodology (UVVM) framework is a great time saver for those who write many testbenches. It provides a utility library with subprograms for logging and formatting text nicely and one-liners for checking signal values.
However, UVVM’s most significant advantage is its VHDL verification component communication scheme. Instead of directly interfacing the device under test (DUT), the sequencer in the main testbench file only talks to bus functional models (BFMs) through function and procedure calls.
It adds an abstraction level that improves the testbench structure and makes reusing verification components in other projects easier.
UVVM already includes verification components for standard interfaces like UART, AXI, Wishbone, SPI, and Ethernet. We will use some to test our demo project and, in the end, create our own VHDL verification component for use with UVVM.
Example project
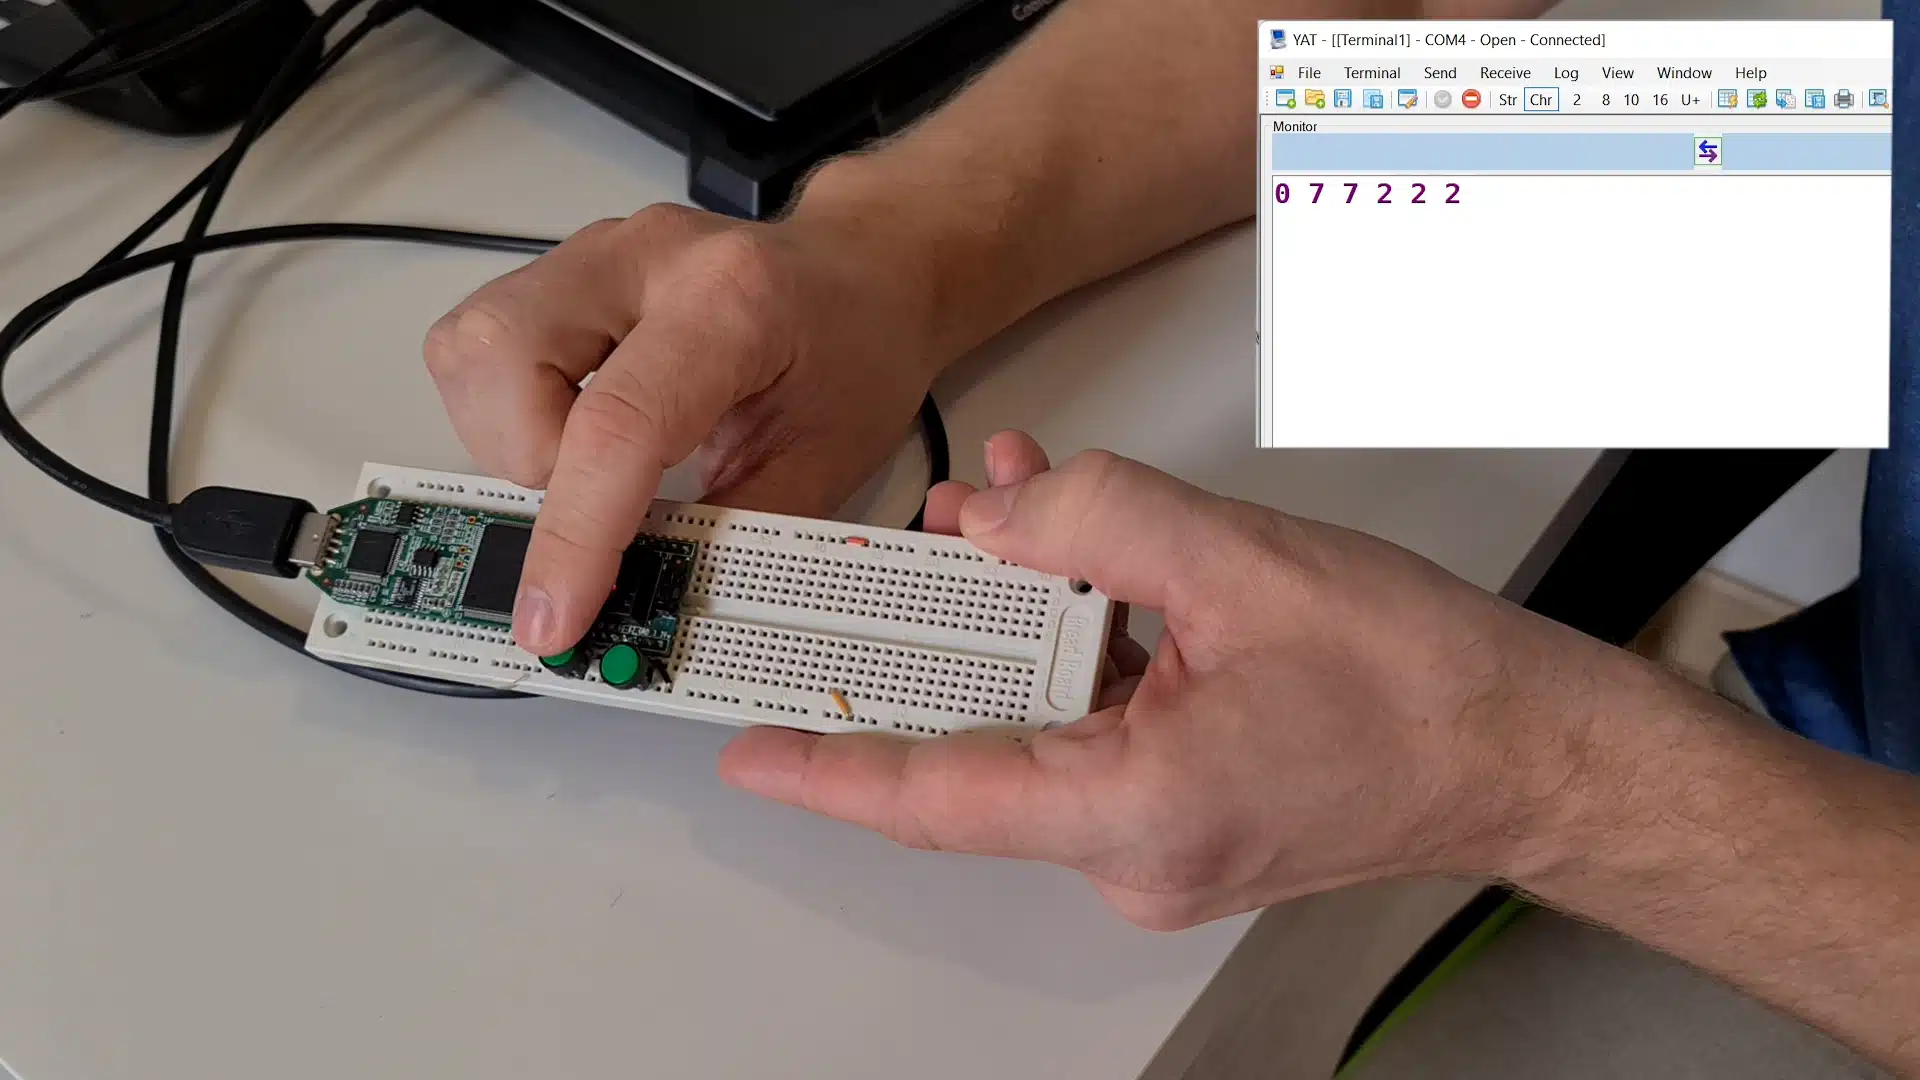
To have something to work with, I’ve created this little FPGA design that will be our device under test (DUT) when we write the UVVM testbench.
The design monitors eight push-button inputs. Whenever you press one of the buttons, the FPGA will transmit the index number of the button over UART. The numeric is encoded as an ASCII character, meaning the sent byte’s value will be the number + 48.
The implementation supports simultaneous button presses, but the logic contains a minor bug causing it to fail to register clicks in certain corner cases. The bug is unlikely to show up in the lab and is difficult to predict simply by studying the code, but hopefully, our UVVM testbench will uncover it in the end. 🙂
VHDLwhiz is not affiliated with or endorsed by the UVVM team, Inventas, or EmLogic.
This course is only available in the VHDLwhiz Membership.
The membership subscription gives you access to this and many other courses and VHDL resources.
You pay monthly to access the membership and can cancel the automatic renewal anytime. There is no lock-in period or hidden fees.
Hardware used in the course
- Lattice iCEstick (SKU: ICE40HX1K-STICK-EVN)
Resellers: Lattice, Farnell, Newark, Mouser, DigiKey
(You can modify the design to use a different FPGA board)
Software used in the course
I am using Windows 11 in the course. All the other software is available for free for Windows and Linux:
- Questa – Intel FPGA Edition(includes Starter Edition)
(Any version of ModelSim or QuestaSim will work) - Lattice iCEcube2 Design Software
(Or the implementation software for your FPGA architecture) - Microsoft Visual Studio Code
(Any editor will do) - Universal VHDL Verification Methodology (UVVM)
- YAT – Yet Another Terminal
(Any serial (UART) terminal program will do)
Course outline
The overview below shows the lessons in this course.

1 - Why we need testbench frameworks
Let's talk about how the Universal VHDL Verification Methodology (UVVM) testbench framework can make your life easier.

2 - The demo project and DUT
This example project will be our device under test (DUT) when we write the UVVM testbench.

3 - Including UVVM in your VHDL project
Let's download the UVVM framework and make it available as a precompiled library in ModelSim/Questa.

4 - Logging, reporting, and verbosity control
You can use the framework's Utility library to create pretty printouts and filter log messages.

5 - Checks and awaits
The Utility library also has assertion-based methods for checking signal values.

6 - Clock generator VVC
To introduce VHDL verification components (VVCs), we will instantiate the simplest possible VVC module.

7 - UART VVC
We will use UVVM's UART VVC to read and check bytes coming from the device under test (DUT).

8 - Custom VVC implementation
UVVM provides a Python script that generates a boilerplate template for creating a custom VVC.

9 - Using the custom VVC
We will map the custom VVC component to a separate Questa library and import it into the main testbench.

10 - Test harness
As a final touch, we will move all signals, instances, and subprograms out of the main testbench file and into a test harness.
This course is only available in the VHDLwhiz Membership.
The membership subscription gives you access to this and many other courses and VHDL resources.
You pay monthly to access the membership and can cancel the automatic renewal anytime. There is no lock-in period or hidden fees.


Reviews
There are no reviews yet.