Course: Transaction-level BFM design in VHDL using Python and AI
Create a bus functional model (BFM) for a VHDL module with multiple configuration options. Learn to make a system that generates custom BFMs for any interface variant the DUT can have.
Description
There exist many bus functional models (BFMs) for standard buses like I2C, SPI, and AXI. But when dealing with custom interfaces, you’re on your own—you need to write the BFM yourself.
This course teaches you how to build a transaction-based BFM for a VHDL module with multiple variants. Instead of manually writing a BFM for each version, I’ll show you how to automate the process.
We’ll start by creating a BFM in VHDL for one configuration of the DUT, then use a Python script to auto-generate custom BFMs for any variant.
I’ll show you how I work AI/ChatGPT to automate parts of the design process. We’ll use it to write the Python code that, in turn, generates VHDL code.
This course is only available in the VHDLwhiz Membership.
The membership subscription gives you access to this and many other courses and VHDL resources.
You pay monthly to access the membership and can cancel the automatic renewal anytime. There is no lock-in period or hidden fees.
No FPGA board is required as this course is a pure simulation exercise.
Software used in the course
I am using Windows 11 in the course. All the other software is available for free for Windows and Linux:
- Questa – Intel FPGA Edition(includes Starter Edition)
(Any version of ModelSim or QuestaSim will work) - Microsoft Visual Studio Code
(Any editor will do)
Course outline
The overview below shows the lessons in this course.

1 - Introduction
Welcome to the course! Let's talk about transaction-based VHDL testbenches and bus functional models (BFMs).

2 - Understanding the problem
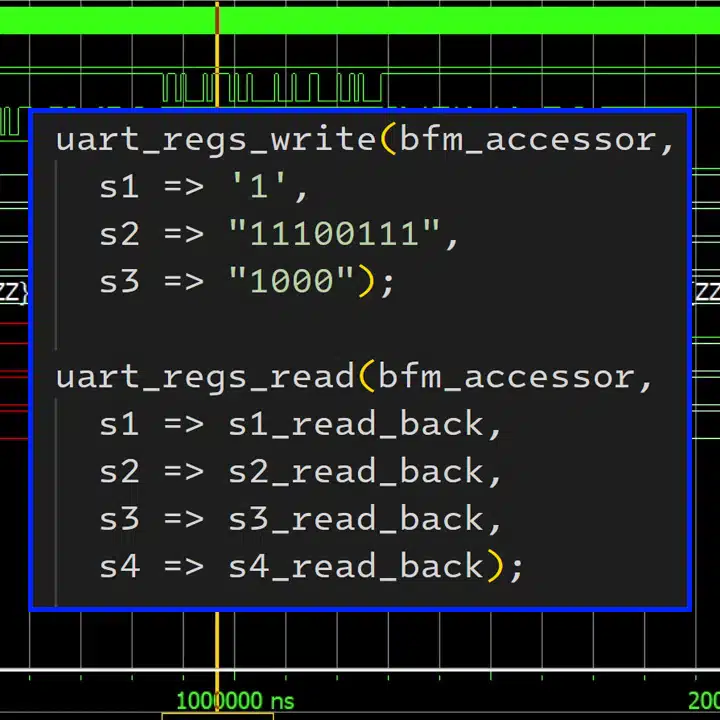
We'll create a simulation model of the host computer communicating with any uart_regs instance. Here's why we need this UART Regs Host BFM and what it will do.

3 - BFM module and package outline
Let's start by defining the bus functional model (BFM) as a VHDL module and package with procedures and a specific accessor record type for the interface between them.

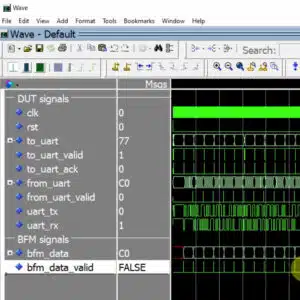
4 - Testbench
It's a good idea to create the testbench as early as possible to simulate the VHDL code as we write it.

5 - Accessor signal
A composite-type VHDL signal will be the interface between the BFM module and the package, but all members of the VHDL record need to be of resolved types for it to work.

6 - Mutex
We'll create a mutual exclusion lock using VHDL's protected type "classes" to ensure that only one procedure call can access the BFM module at the time.

7 - TX procedure
Let's implement the functionality in the BFM module that will send new register values to the DUT using UART and the custom data framing protocol.

8 - Sending the read request
We must first send an unescaped read request byte to make the uart_regs module sample and return all register values. Let's do that and start on the uart_regs_read procedure.

9 - Receiving bytes
The DUT uses a custom data framing protocol to transfer register values to the host. We need to unpack the frame and unescape any escaped bytes.

10 - Register read back
When the BFM module receives a data frame from the DUT, it must pass it on to the waiting uart_regs_read procedure call. If there is no waiting caller, that's an error we must deal with.

11 - ChatGPT AI assistance
Let's use artificial intelligence (AI) to make the Python function that will generate a BFM package customized to any given UART Regs DUT and a demo testbench specific to that project.

12 - Testing the autogenerated BFM
Finally, we'll revisit the IoT project I showed you at the start of the course. Let's see if we can use our new BFM generator to improve this testbench.
This course is only available in the VHDLwhiz Membership.
The membership subscription gives you access to this and many other courses and VHDL resources.
You pay monthly to access the membership and can cancel the automatic renewal anytime. There is no lock-in period or hidden fees.

Reviews
There are no reviews yet.