Course: Getting started with PetaLinux
$59
Learn to implement system-on-chip (SoC) designs using embedded Linux for AMD Xilinx FPGAs. This course gives you the skills to succeed with PetaLinux on Zynq-7000 (ARM) devices.
Description
PetaLinux is a Linux distro AMD Xilinx maintains specifically for their devices. It can run on soft-core MicroBlaze processors or the Zynq-7000 series FPGAs with hard ARM CPU cores. This course focuses on the latter, although most of the process is identical for MicroBlaze.
It’s easy to get overwhelmed by PetaLinux as it involves many components and tools. Therefore, I’ve made this step-by-step tutorial to give you the skills you need to succeed on your own.
You will also learn to customize PetaLinux, install software and device drivers, and develop and debug C applications that interact with your VHDL modules.
See the video below for a preview of selected lessons.
This course is also available in the VHDLwhiz Membership.
The difference is that when you purchase this product, you get permanent access to the course, while the membership charges a monthly fee to access the content.
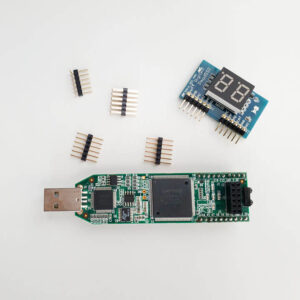
Hardware used in the course
- Arty Z7-20: Xilinx Spartan-7 FPGA (SKU: 410-346-20)
Resellers: Digilent, Farnell, Newark, DigiKey
(You can use any Zynq-7000 FPGA board.) - An Ethernet-to-USB adapter or Ethernet cable to your router
(If you want to use the TFTP boot method) - A micro SD card
(If you want to use the SD card boot method)
Software used in the course
I am using Windows 11 in the course. All the other software is available for free for Windows and Linux:
- Xilinx AMD Vivado
- PetaLinux Tools
- VMware Workstation Pro
(Available for free after Broadcom’s VMware takeover) - Ubuntu Linux – Desktop version
(We’ll install Ubuntu as a virtual machine in VMware) - Microsoft Visual Studio Code
(Any editor will do)
Course outline
The overview below shows the lessons in this course.

1 - Introduction
Welcome to the course! Here's what we'll do and what you will learn from the lessons.

2 - Install Linux virtual machine
The easiest way to work with PetaLinux in Windows is to use the free VMware software to create a Ubuntu Linux virtual machine and install the Xilinx tools there.

3 - Install Vivado in Linux
Vivado works well in Ubuntu even though Xilinx AMD doesn't officially support it. I'll walk you through the installation and create the first block design with a ZYNQ7 Processing System.

4 - Install PetaLinux Tools and dependencies
This video shows how to download, install, and configure PetaLinux Tools on Ubuntu. We'll also install a TFTP server and the Minicom serial communication program.

5 - First PetaLinux build + TFTP boot
Let's export the hardware from Vivado to PetaLinux Tools, build it, and start it on the FPGA board using the TFTP Ethernet boot method.

6 - SD card boot
Booting from an SD card is also an option. You must manually copy the BOOT.BIN and other files to the card, but an advantage is that changes made to the root filesystem persist after rebooting.

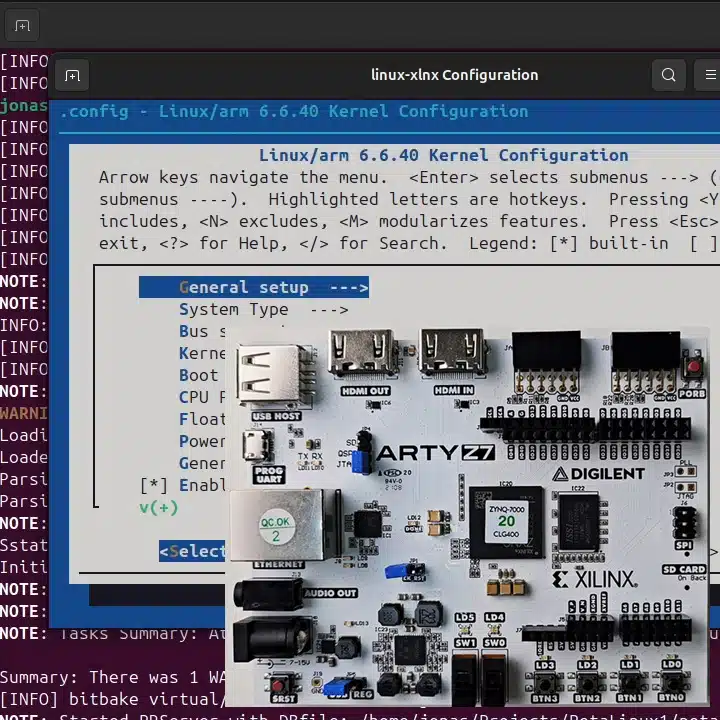
7 - Configuring PetaLinux
Don't let the PetaLinux Tools commands confuse you! Watch this video to learn how to use the config menus and understand how PetaLinux works under the hood.

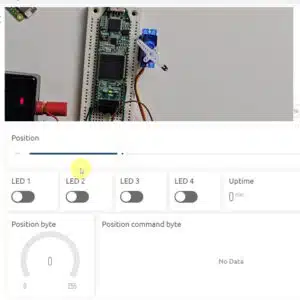
8 - The Xilinx AXI GPIO IP
We'll add a Xilinx GPIO to our second Vivado block design, and I'll show you how to control it easily from PetaLinux using the userspace /sys/class/gpio Sysfs interface.

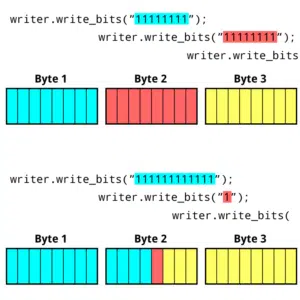
9 - Creating a custom AXI4-Lite VHDL module
Learn to create IP modules in Vivado containing your custom VHDL code. With Vivado's IP Packager, we'll make an AXI4-Lite slave module and access its registers from PetaLinux.

10 - Remote debugging PetaLinux C programs in VSCode
You can debug C apps running in PetaLinux using GDB and gdbserver to step through the code and show variable values in the VSCode editor on Ubuntu.
This course is also available in the VHDLwhiz Membership.
The difference is that when you purchase this product, you get permanent access to the course, while the membership charges a monthly fee to access the content.
Reviews
There are no reviews yet.