Course: MicroBlaze SoC design
$59
Learn how to build a system-on-chip (SoC) design by using a MicroBlaze soft-core processor, existing IP cores, and custom VHDL modules.
Description
The most cost-effective way to develop an FPGA design is to combine software and hardware and use existing IP cores when available. You get the best of both worlds by using software to implement the control path and hardware for the data-intensive parts with strict timing requirements.
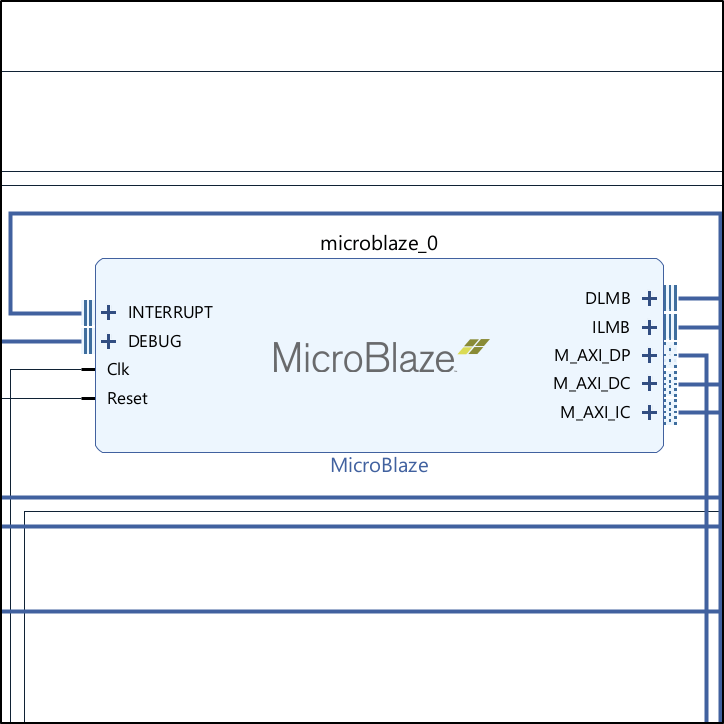
You can turn most FPGA projects into SoC designs using a soft-core processor like Xilinx’s MicroBlaze, and I will walk you through setting up such a system from scratch in this course.
This course is also available in the VHDLwhiz Membership.
The difference is that when you purchase this product, you get permanent access to the course, while the membership charges a monthly fee to access the content.
FPGA board
I use the Digilent Arty S7 FPGA development board, but many other Xilinx boards will work too.
However, you may have to make slight modifications to the design, depending on which features exist on your board. I will mention that when we get to those parts of the course.
If you don’t have a suitable board, you can still install the software and do all exercises. I will show the results on my board anyway.
Software used in the course
All the software used in this course is available for free and works on Windows and Linux.
You need the Vivado FPGA implementation software and the Vitis software development kit from Xilinx to follow this course. You can install both by downloading and running the Xilinx Unified Installer.
The free (WebPack) version of the Xilinx software is sufficient to replicate what I’m doing in the lessons.
I’m using the free Microsoft Visual Studio Code editor, but you can use the built-in editors in Vivado and Vitis or any editor you like.
Course outline
The overview below shows the lessons you can access after purchasing this course.

1 - Introduction
The most cost-effective way to develop an FPGA design is to combine software and hardware and use existing IP cores when available.

2 - Block design in Vivado and common pitfalls
Connection and block automation is a great time-saver when creating block designs, but it often makes mistakes. In this lesson, you will learn to spot some of them.

3 - Generating and exporting hardware from Vivado
With Vivado's board files, you can quickly create a block design that produces output, even without writing a single code line and specifying any constraints.

4 - Getting started in Vitis
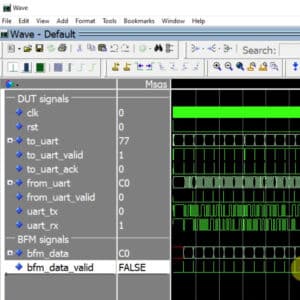
Vitis is Xilinx's software development kit for system-on-chip designs. In this lesson, we create a program that runs on the Microblaze processor and sends text to the computer over UART.

5 - Adding DDR3 memory in Vivado
The Arty S7 board has a DDR3 RAM chip connected to the FPGA. We must add a memory interface generator to the block design to access it from the MicroBlaze.

6 - The stack and heap
We have to change the linker script to utilize the added RAM from the MicroBlaze. And it helps to understand how memory management works in a C program.

7 - Interfacing GPIO
Let's add an AXI GPIO slave module to the block diagram to read the slide switches from the MicroBlaze.

8 - Interrupts
Using interrupts instead of polling allows the processor to perform other tasks while waiting for new switch events.

9 - IP Packager
The easiest way to create a new AXI slave and add it to the block design is to use Vivado's IP Packager wizard.

10 - Editing the VHDL template
Let's dive into the auto-generated VHDL code and modify some of the software-accessible registers using VHDL.

11 - Custom AXI4-Lite PWM controller VHDL module
Let's dive into the auto-generated VHDL code and modify some of the software-accessible registers using VHDL.

12 - Combining with interrupts
Finally, we will complete our design by making the C program change the LED's brightness when we flick a switch.
Reviews
There are no reviews yet.